Written by Money Crashers Staff and published on https://www.moneycrashers.com/.
During the winter, it’s a good idea to keep a close eye on your roof. You can try to remove snow and ice yourself. However, many people end up puncturing shingles or the roof’s waterproof membrane and causing damage as they scrape extra hard to remove ice buildup.
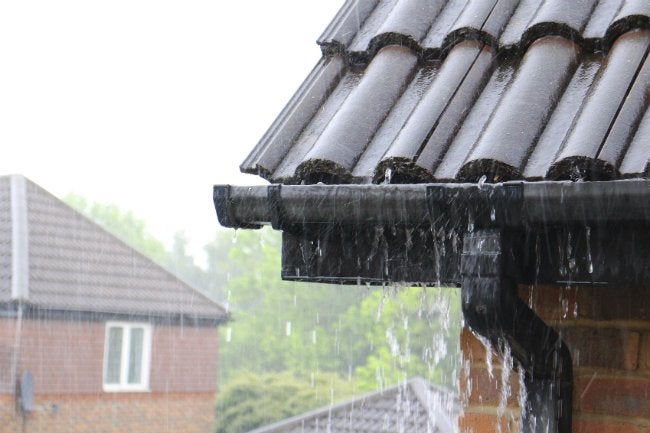
Roofing material manufacturers understand the importance of moisture resistance, and they design shingles so water runs off the surface. Water-resistance is complete enough to ensure no moisture seeps in and penetrates the lower roof deck. However, no roof is completely waterproof, running water won’t get in your shingles but ice dams and snow build-up can cause pooling water that penetrates even brand new roofs. Similarly, flashing is constructed of either galvanized steel or aluminum. Flashing is designed to fit around vents and chimneys to prevent water penetration in seams and cracks. Water runs directly off the metal and into the drainage system. Taking care of these issues before they cause damage can be the difference between a small maintenance fee or a costly repair.
How
to Prevent & Remove Ice Dams on Your Roof This Winter
Preventing and removing ice dams is critical. Damage to your home’s roof from excess snow and ice buildup can ruin your winter season. Even if you’ve winterized your home, an ice dam may still form on the edges of your roof – and it can be a nightmare waiting to happen.
Ice dams can form slowly and unexpectedly –
unless you know what to look for. If left unchecked, melting ice water will
find its way into your home, costing you thousands in repair bills.
What Is an
Ice Dam?
An ice dam is a thick band of ice that forms
along the edge of a roof, preventing water and melting snow from draining
properly. Since water cannot drain, it backs up and can be forced beneath the
shingles, leaking into your home. Water entering in this manner can have
multiple exit points, causing damage to walls, ceilings, and insulation.
If you’ve never had an ice dam, you should
still be prepared given they can form at any time under the right
conditions. Prevention is key, and simply knowing what to look for is crucial.
For example, the formation of large icicles or
a ridge of ice along a roof’s edge is a sure sign of potential problems. If you
see ice build-up in typically ice-free areas, you almost certainly have an ice
dam in progress. Common areas to check are the sides of exterior walls and
along exterior vents, window frames, and soffits (the underside of the eaves).
How Ice
Dams Form
The earlier you can detect signs of ice dam
formation, the better you can prevent damage. Here are several causes.
- Poor
Insulation and Ventilation. Poorly
installed insulation won’t allow proper ventilation, often causing too much
warm air to leak into your attic. When excessive heat builds up, the snow on
the roof melts. This can occur beneath a thick blanket of snow on your roof,
completely obscured from your view on the ground. As meltwater runs off, it
freezes near the edges since the last 6 to 18 inches of your roof is often
colder.
- Mild
Daytime Winter Weather. Winter days with
temperatures just above freezing and nights that fall below 32 degrees result
in a cycle of thawing and freezing on your rooftop, promoting the buildup of
ice.
- Flat-Pitched
Roofs. Roofs that angle at a flatter pitch are more
prone to having ice dams than steep roofs since water drains off less
effectively.
- Deep Snow
Piles. Thin patches of snow here and there are
hardly cause for concern. However, a substantial snowfall producing four to six
inches or more on your rooftop can be dangerous – especially when combined with
other conditions that contribute to ice dam formation.
Remember, no matter how well you’ve insulated
your attic, heat leakage can still occur from your living space into the cavity
between your ceiling and your roof – especially if you keep your house
unusually warm.
Ice Dam
Prevention
Don’t wait until water leaks into your home
causing structural damage. A little bit of preventative maintenance can go a
long way in keeping ice dams from ever forming.
1.
Use a Roof Rake
The best way to prevent an ice dam is simply
to remove the snow from your roof before it has a chance to melt and refreeze.
A roof rake is all you need.
A roof rake is essentially a flat shovel at
the end of a long pole, often with extensions to make it even longer. These
rakes allow you to pull snow off your roof while standing firmly on the ground.
Roof rakes work best when removing fresh,
fluffy snow rather than wet or hard snow that has solidified. You can get most
(if not all) the snow off the roof of a one-story house using a roof rake.
Two-story homes are more difficult, but even removing snow from the last few
feet of your roof can go a long way.
There are several types of roof rakes on the market – most sell for $30 to $80. Some have wheels on the blade to prevent damage to shingles, while others have telescopic handles rather than rod extensions for a quicker height adjustment.
2.
Install Heat Cables
Electric heat cables are installed along the edge of a roof to melt snow before an ice dam forms. Do-it-yourself heat cable kits are available from many home improvement supply retailers. How much they cost depends on the size of your roof and the length of cable you need, but generally, a heat cable kit can cost anywhere from $20 to $200, not including the added tools you may need to buy to finish the job.
3.
Improve Attic Insulation
The best way to permanently address the
problem of recurring ice dams is to improve the insulation in your attic. This
does not mean piling on more insulation, as a poor job, no matter how much
insulation you use, will not stop the ice dams from forming.
Instead, focus on plugging gaps, realigning
improperly installed insulation, and stopping the trickle of warm air from
areas such as light fixtures, conduits, and electrical outlets. These measures
can make a big difference, though calling a professional is often required.
4.
Improve Attic Ventilation
To further cool your attic, you can improve ventilation by installing ventilation systems. There are many options, including soffit vents, attic ventilator fans, and turbine ventilators. However, installation likely requires professional assistance.
Ice Dam
Removal
If you find yourself with an ice dam, removal
should be an immediate priority. The following methods should alleviate the
problem until a more permanent solution (such as making structural changes) can
be implemented.
1.
Chip and Hammer
Chipping away at the ice is typically very effective. However, you are at high risk of unintentionally damaging your roof. Therefore, when selecting a hammering tool, choose wisely: an ice pick might be a better choice than a hatchet to preserve your shingles. And a rubber mallet, while less efficient at breaking up the ice, might be much better for your roof than a claw hammer.
Rather than completely breaking apart the ice
dam, it may be enough to create channels for drainage. This is only a stopgap
measure, but you need to divert leaking water as quickly as possible.
2.
Spray Warm Water
A spray bottle filled with warm water can work
wonders. Trying to melt a thick ridge of ice this way may not be feasible,
especially if the ice encompasses the entire perimeter of the roof. However,
this method can be effective if you focus your ice-melting efforts on specific
problem spots.
3.
Apply Chemical Deicer
Chemicals can clear a roof dam quickly.
Unfortunately, depending on the product you use, they may harm or discolor your
roof while causing damage to sensitive shrubs or plants.
Take proper precautions by checking the labels
of deicing products for possible warnings, and cover your garden plants with a
tarp for protection. Generally, calcium chloride-based products are safer than
other chemical deicers. Avoid sodium chloride-based products or rock salt as
these will surely damage your roof due to their corrosive properties.
4.
Place an Ice Dam Sock
Creating drainage channels can be a good
temporary fix to ensure that water does not leak into your house. To do so,
create an ice dam sock with chemical deicer and women’s nylon stockings by
following these steps:
- Fill the stockings with calcium chloride and tie the open end so it will not spill out.
- Identify the sections of the roof that are your biggest trouble spots.
- Climb a ladder and carefully place the nylons on the ice dam perpendicular to the edge of your roof, several feet apart. The calcium chloride in the stockings will react with the ice, forming channels in the ice dam within several hours. If you prefer not to use a ladder, pitch the nylon stockings onto the edge of your roof. Tie a long piece of string to the end of the stocking to position it and eventually pull it down.
The nylon stocking method works very well, but
eventually, the calcium chloride in the stocking will completely dissolve,
allowing the channels to refill. However, it’s a workable short-term solution
until you can permanently eliminate the ice dam.
Call a
Professional
If you have immediate water leakage or simply do not feel capable of removing an ice dam, call a professional roofer, contractor, or ice dam removal company (which does exist in places with colder climates). Keep these question in mind when determining who to hire:
- Is the company or individual an experienced
professional?
- Which methods will be used? Is there a risk of
structural damage to the roof?
- Can you set a specific date and time when the
work will begin?
- Is the company or individual insured?
Many professional ice dam removal companies
use steam to quickly and harmlessly melt ice dams. However, less-reputable contractors
may use metal shovels or high-temperature pressure washers which can harm the
integrity of your shingles. Again, always determine which method will be
utilized prior to hiring.
Final Word
With ice dams, it’s always wise to take safety
precautions. Avoid climbing entirely onto the roof and make sure you have
assistance when using a ladder. Winter is the most dangerous time of year to be
doing this kind of work, so be careful and stay safe.
Original post here https://ift.tt/2xkQgVK.
The post How Snow And Ice Impact Your Roof appeared first on Pro Roofing Wollongong.
from Pro Roofing Wollongong https://ift.tt/2KwOkCI
via IFTTT